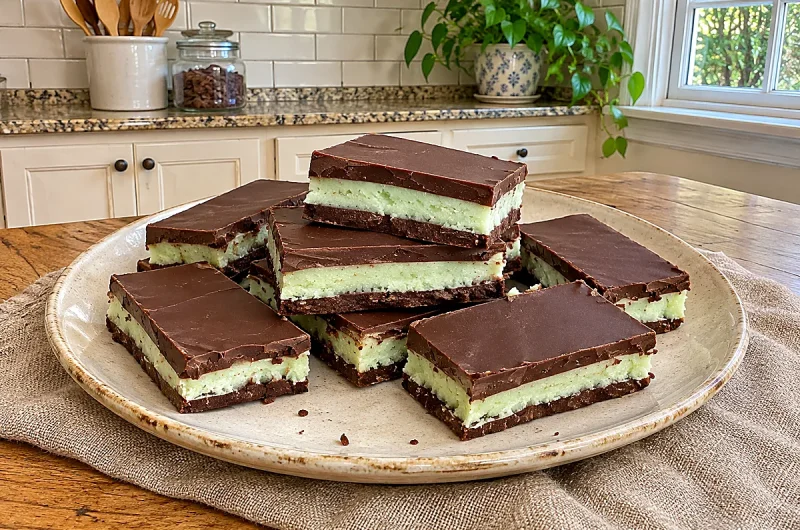
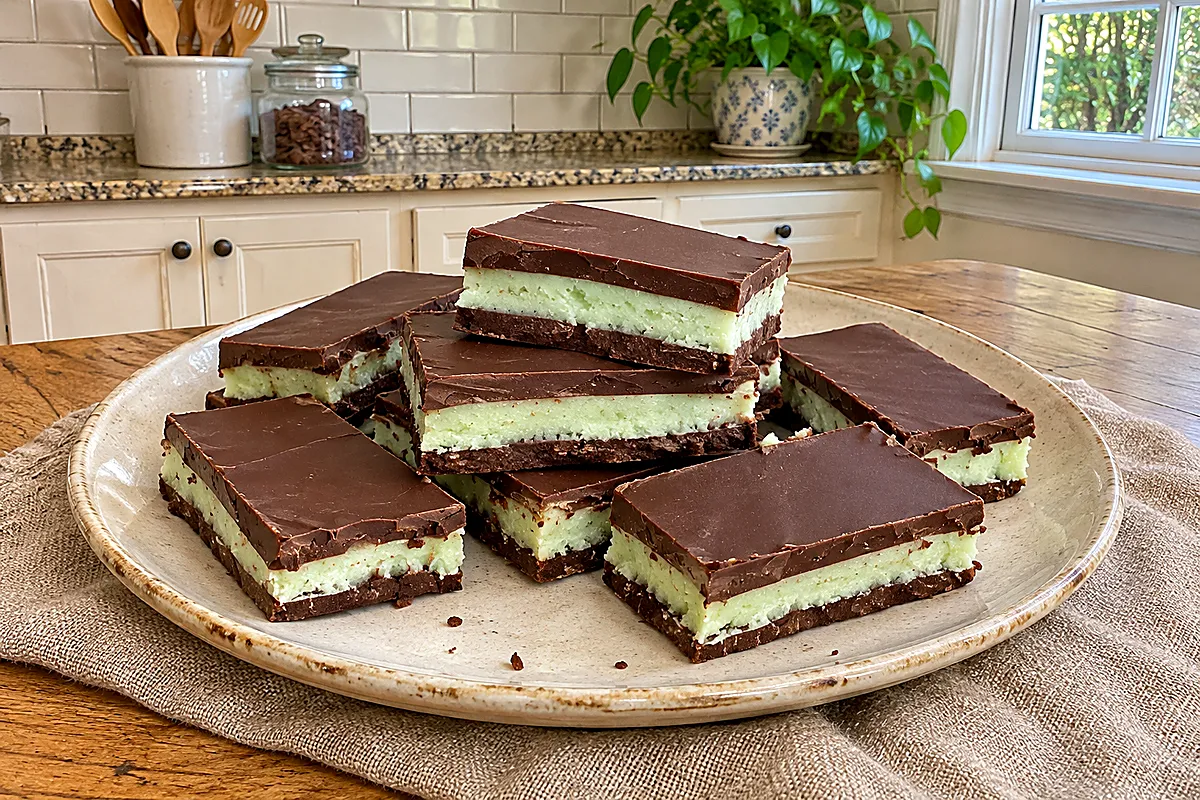
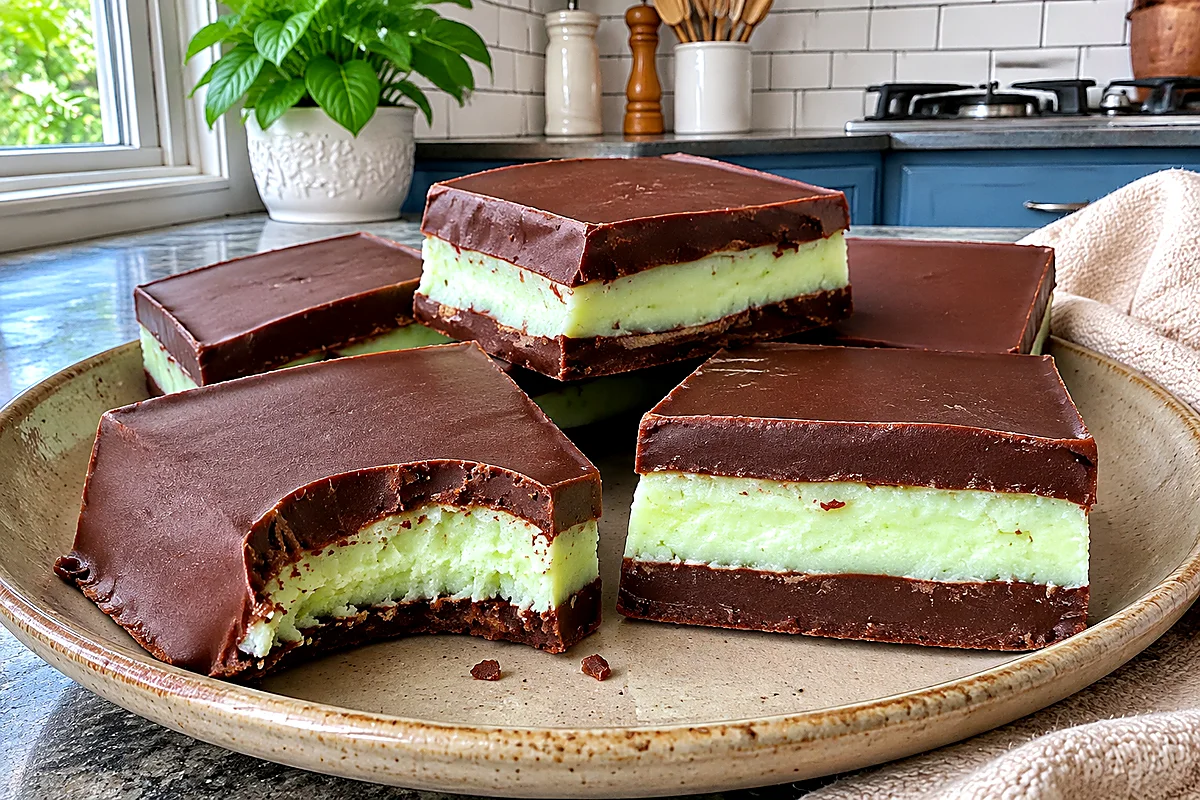
These chocolate mint candy squares stack a thin dark chocolate base, a cool peppermint white-chocolate center, and a matching dark chocolate top. You melt, spread, and chill each layer in a parchment-lined 8×8-inch pan, then slice the slab into neat little squares.
Table of Contents
The method needs no oven and no candy thermometer. Melt half of the dark chocolate chips, spread them in the pan, and chill until firm. Next, melt the white chocolate with peppermint extract and a little green gel food coloring, spread that mint layer, and chill again. Finish with the remaining dark chocolate, chill until set, and cut.
Why You’ll Love This Chocolate Mint Candy
- Only four ingredients: dark chocolate chips, white chocolate chips, peppermint extract, and green gel food coloring.
- A no-bake method: you melt, spread, and chill, so the oven stays off.
- Clean three-layer squares: each bite shows a dark edge around a pale mint center.
- Make-ahead friendly: chill the slab overnight, then slice a tray of homemade chocolate mints when you need them.
Ingredients You’ll Need
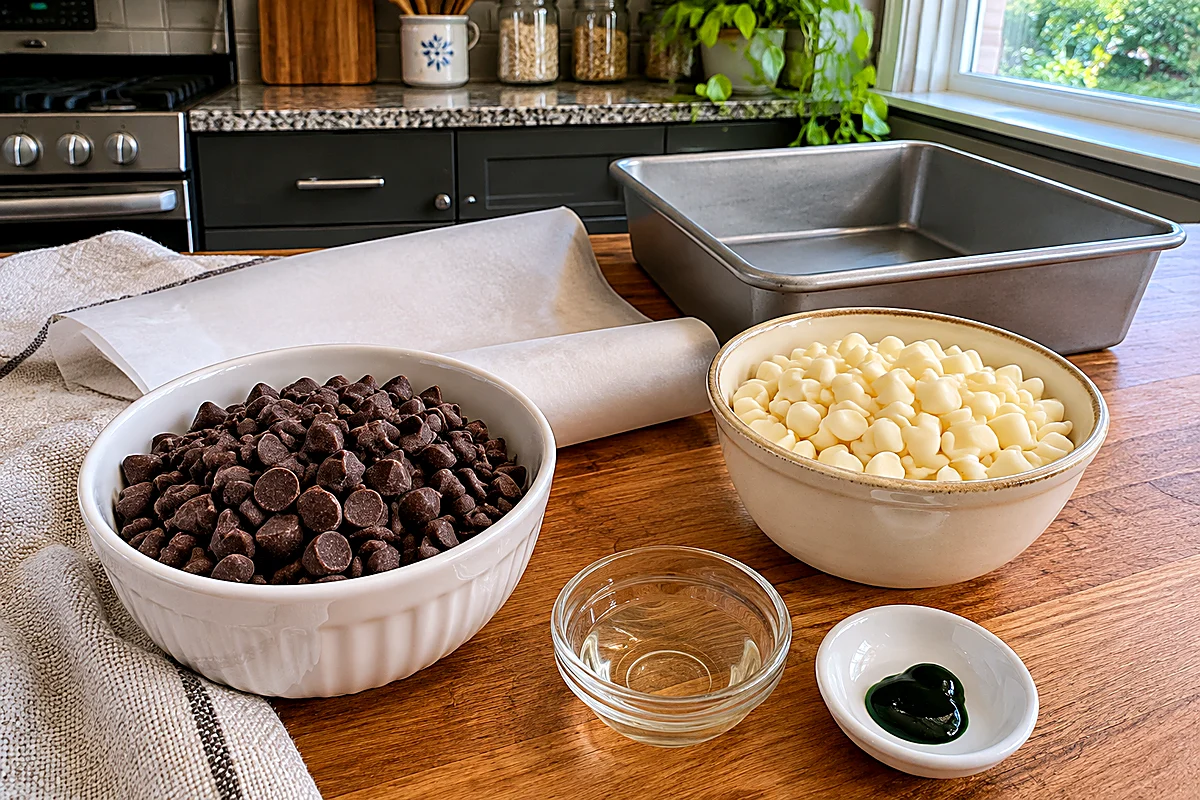
This chocolate mint candy recipe uses 11 ounces dark chocolate chips and 11 ounces white chocolate chips. You also need 1 teaspoon peppermint extract and green gel food coloring. A parchment-lined 8×8-inch pan holds every layer.
Chocolate Layers
- 11 oz dark chocolate chips: divide them in half, about 5 1/2 ounces for each layer. A smooth melting chocolate gives a clean snap after the chill.
Mint Center
- 11 oz white chocolate chips: these melt into the pale peppermint layer in the middle.
- 1 tsp peppermint extract: stir this into the melted white chocolate for a clear mint flavor. Measure carefully, because a little goes a long way.
- Green gel food coloring: a small amount tints the center a soft mint green. Choose a gel color, not a thin liquid coloring, so the chocolate stays smooth.
Ingredient Notes
Divide the dark chocolate before you start so both chocolate layers stay even. Melt every batch in a completely dry bowl, because a drop of water can thicken melted chocolate in a hurry.
Gel coloring blends into white chocolate more cleanly than a watery color. Add it a little at a time until the mint layer turns a pale green. Leave a parchment overhang on two sides of the pan. That sling helps you lift the set slab and cut the chocolate mint squares.
How to Make Chocolate Mint Candy
Work one layer at a time, and let each layer firm up before you add the next. That keeps the bands sharp in this no bake chocolate mint candy.
Step 1: Line the Pan
Line an 8×8-inch pan with parchment paper, and leave an overhang on two sides. Smooth the paper into the corners so the first layer of chocolate mint candy sets in an even sheet.
Step 2: Melt and Spread the Bottom Dark Layer
Place 5 1/2 ounces of the dark chocolate chips in a dry microwave-safe bowl. Heat them in 20- to 30-second bursts, and stir after each burst, until the chocolate looks smooth and just melted. Pour it into the pan and spread a thin, even layer from edge to edge. Chill the pan until the surface feels firm, about 15 minutes.
Step 3: Melt and Tint the Peppermint Layer
Melt the 11 ounces of white chocolate chips in the same way, in short bursts, and stir until smooth. Pull the bowl from the heat. Stir in 1 teaspoon peppermint extract, then add enough green gel food coloring to tint the chocolate a soft mint green.
Stop at a pale color; a heavy dose of color is not necessary. Skip thin liquid coloring here, because extra water can make melted white chocolate thick, dull, and hard to spread.
Step 4: Spread and Chill the Mint Center
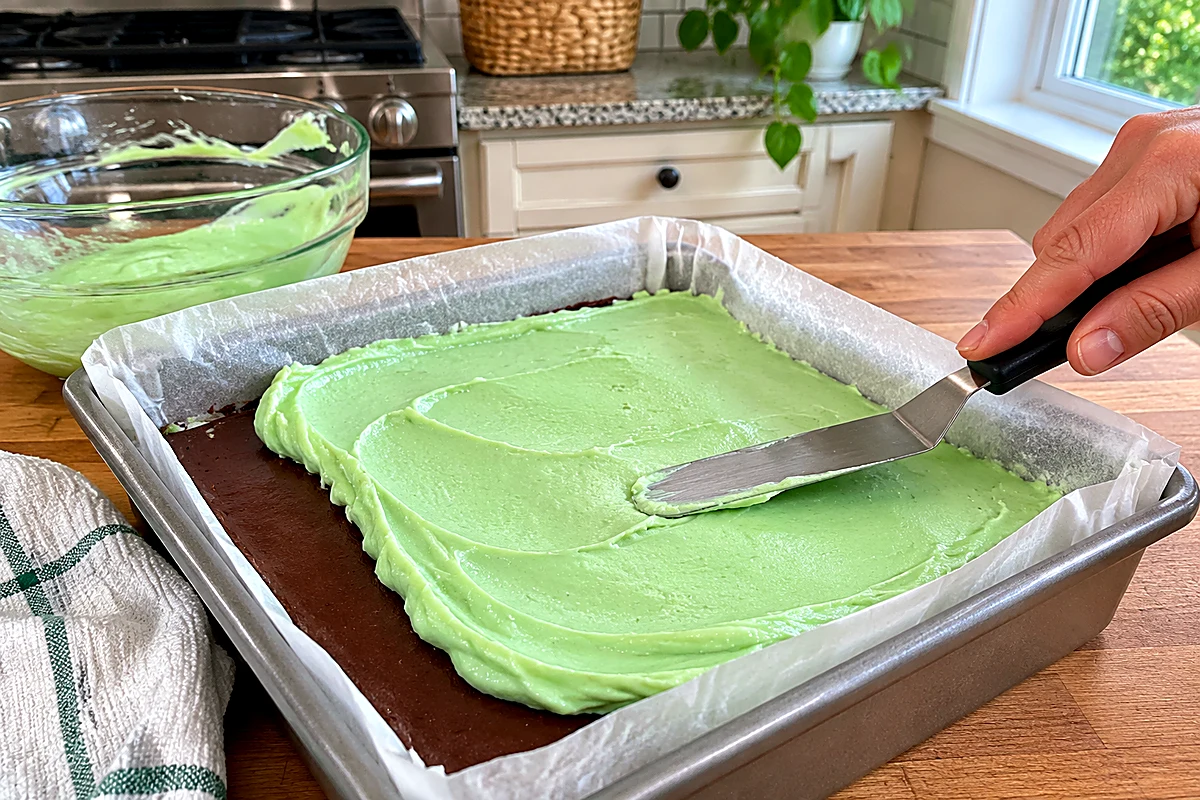
Spread the green peppermint layer over the set dark chocolate. Work quickly and gently so you do not drag up the bottom layer. Return the pan to the refrigerator, and chill until the mint layer feels firm, about 15 minutes.
Step 5: Add the Top Layer, Then Chill and Cut
Melt the remaining 5 1/2 ounces of dark chocolate chips until smooth. Spread this last layer over the mint center and smooth the top. Chill the pan until the whole slab feels firm, about 30 to 45 minutes.
Lift the slab out with the parchment. Rest it at cool room temperature for 3 to 5 minutes, then cut it into small squares with a warm, dry knife. Wipe the blade between cuts so the layers stay tidy.
Move leftovers into a covered container and refrigerate them promptly, following this USDA guidance on leftovers and food safety.
Expert Tips for the Best Chocolate Mint Candy
- Keep bowls and spoons dry: even a little water can seize melted chocolate.
- Use short microwave bursts: overheated white chocolate turns thick and lumpy.
- Chill until just firm: a rock-hard frozen layer can refuse to bond with the next pour, while a still-wet layer will smear.
- Warm and dry the knife: run the blade under hot water, dry it, and then cut.
- Tint lightly: a soft mint green looks more natural than a deep, heavy color.
Chocolate Mint Candy vs Peppermint Bark
This chocolate mint candy is a tidy three-layer square, with dark chocolate on the top and bottom and a smooth peppermint center. Peppermint bark is usually two layers of chocolate, often finished with crushed peppermint candy and broken into irregular shards.
The two treats share a mint-and-chocolate flavor, but they do not look or cut the same way. Round dipped mints are different again, because they start with a soft fondant-style center rather than a spread layer. For neat, bite-size layered mint chocolate candy, this chill-and-slice method is the better fit.
Variations
- Stronger contrast: pick a deeper dark chocolate for the top and bottom so the mint center stands out.
- A cooler mint note: after you stir in the extract, smell the melted white chocolate. Add one extra drop only if you want more peppermint, then stir well.
- Thin rectangles: cut the slab into narrow pieces for a classic mint-thin shape.
What to Serve With Chocolate Mint Candy
These chocolate mint squares belong on a holiday dessert tray. Pair them with santa cookies for a playful cookie-and-candy plate. A few pieces of divinity candy add a soft, snowy contrast.
If you want a richer bite on the same board, include sugar free candy bars. A pitcher of candy cane Christmas punch gives the tray a festive drink without much extra work.
Make Ahead and Freezing
You can make the slab a day ahead, keep it chilled, and cut the squares the next day. For a longer hold, freeze the cut pieces in a single layer until firm. Then pack them in an airtight container with parchment between the layers.
Thaw the candy in the refrigerator, still covered. According to this Iowa State University Extension guidance on chocolate storage, chocolate keeps its look and flavor best in an airtight container. Keep it away from moisture and strong odors. Wrap refrigerated or frozen squares well. Let them return to a cool room temperature while still covered, so moisture does not settle on the surface.
Storage and Serving
Store the cut chocolate mint candy in an airtight container in the refrigerator, with parchment between layers. Serve the squares slightly cool, after a few minutes on the counter. The mint center smells fragrant, and the chocolate still holds a clean edge.
Keep the tray out of a warm kitchen for long stretches. Follow the USDA leftovers guidance linked above, and refrigerate leftovers in a covered container as soon as you can.
Frequently Asked Questions
How do you get clean layers in chocolate mint candy?
Let each layer chill until it feels firm to the touch, but not so hard that the next pour cannot cling. Spread the new layer quickly and gently, and keep the pan flat in the refrigerator between steps.
Why did my mint chocolate layer seize?
A drop of water, a thin liquid color, or too much heat can make melted white chocolate thick and lumpy. Use a dry bowl, choose gel food coloring, and melt the chips in short bursts, stirring often.
How do you cut chocolate mint candy without cracks?
Lift the fully chilled slab out with the parchment, then let it rest at cool room temperature for 3 to 5 minutes. Cut with a warm, dry knife, and wipe the blade after every slice.
How long does homemade chocolate mint candy last?
Keep the squares in an airtight container in the refrigerator, with parchment between layers. Enjoy them while the chocolate still looks smooth and smells fresh. Follow the USDA leftovers guidance if you are storing a tray from a party.
Can you freeze chocolate mint candy?
Yes. Freeze the cut squares in a single layer, then pack them in an airtight container with parchment between the layers. Thaw them in the refrigerator, still wrapped, so condensation stays off the chocolate.
Chocolate Mint Candy
Three-layer chocolate mint candy with dark chocolate, a peppermint white-chocolate center, and a clean chill-and-slice finish.
36 small squares
servings25
minutes10
minutes1
hour50
minutesIngredients
11 oz dark chocolate chips, divided (5 1/2 oz for the bottom layer and 5 1/2 oz for the top)
11 oz white chocolate chips
1 tsp peppermint extract
Green gel food coloring
Directions
- Line an 8×8-inch pan with parchment paper, leaving an overhang on two sides.
- Melt 5 1/2 oz dark chocolate chips in a dry microwave-safe bowl in 20- to 30-second bursts, stirring after each burst, until smooth. Spread an even layer in the pan. Chill until firm, about 15 minutes.
- Melt 11 oz white chocolate chips the same way. Take the bowl off the heat. Stir in 1 tsp peppermint extract and enough green gel food coloring to tint the chocolate a soft mint green.
- Spread the mint layer over the set dark chocolate. Chill until firm, about 15 minutes.
- Melt the remaining 5 1/2 oz dark chocolate chips until smooth. Spread it over the mint layer. Chill until the slab is firm, about 30 to 45 minutes. Lift out with the parchment, rest 3 to 5 minutes, and cut into small squares with a warm, dry knife, wiping the blade between cuts.
Notes
- Use gel food coloring, not a thin liquid coloring, so the white chocolate stays smooth.
- Keep bowls and spoons completely dry.
- Refrigerate leftovers promptly in a covered container, following USDA leftovers guidance.
- Wrap well if you freeze the squares, following chocolate storage guidance from Iowa State University Extension.