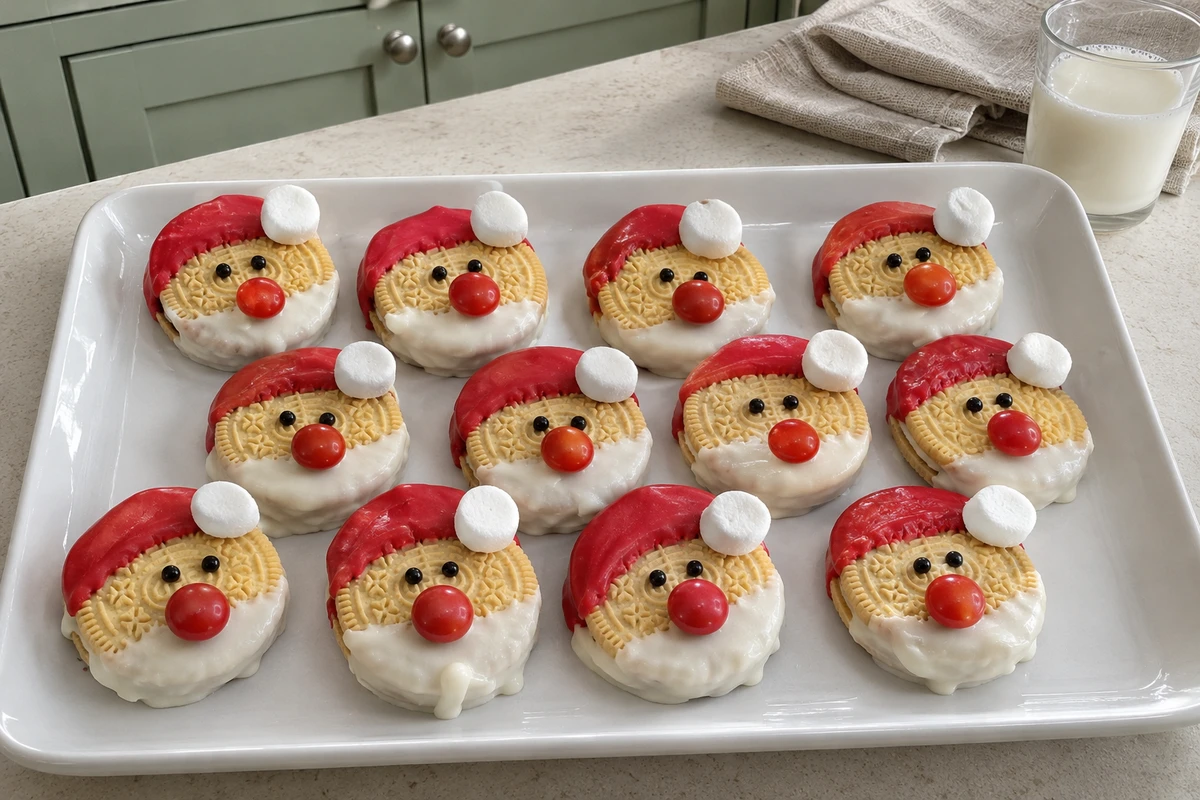
These santa cookies turn ordinary golden vanilla sandwich cookies into a cheerful holiday tray. Each one gets a white candy beard, a bright red hat, a soft marshmallow pompom and a tiny candy nose, so the platter looks festive without turning on the oven.
The no-bake method is easy enough for a weeknight Christmas project. Coatings set quickly, slightly uneven dips still look charming, and a batch of about 24 santa cookies is ready in roughly an hour.
Why You’ll Love These Santa Cookies
- Truly no-bake: the cookies are already baked, so you only melt, dip and decorate.
- Fast and photogenic: a platter of smiling faces looks bright on a dessert table and in photos.
- Simple decorations: candy melts, marshmallows and small candies create a full Santa look with little skill.
- Make-ahead friendly: finish them the day before and store in an airtight container until serving.
Ingredients You’ll Need
Gather the decorations before you melt the coatings so everything goes on while the candy is still soft.
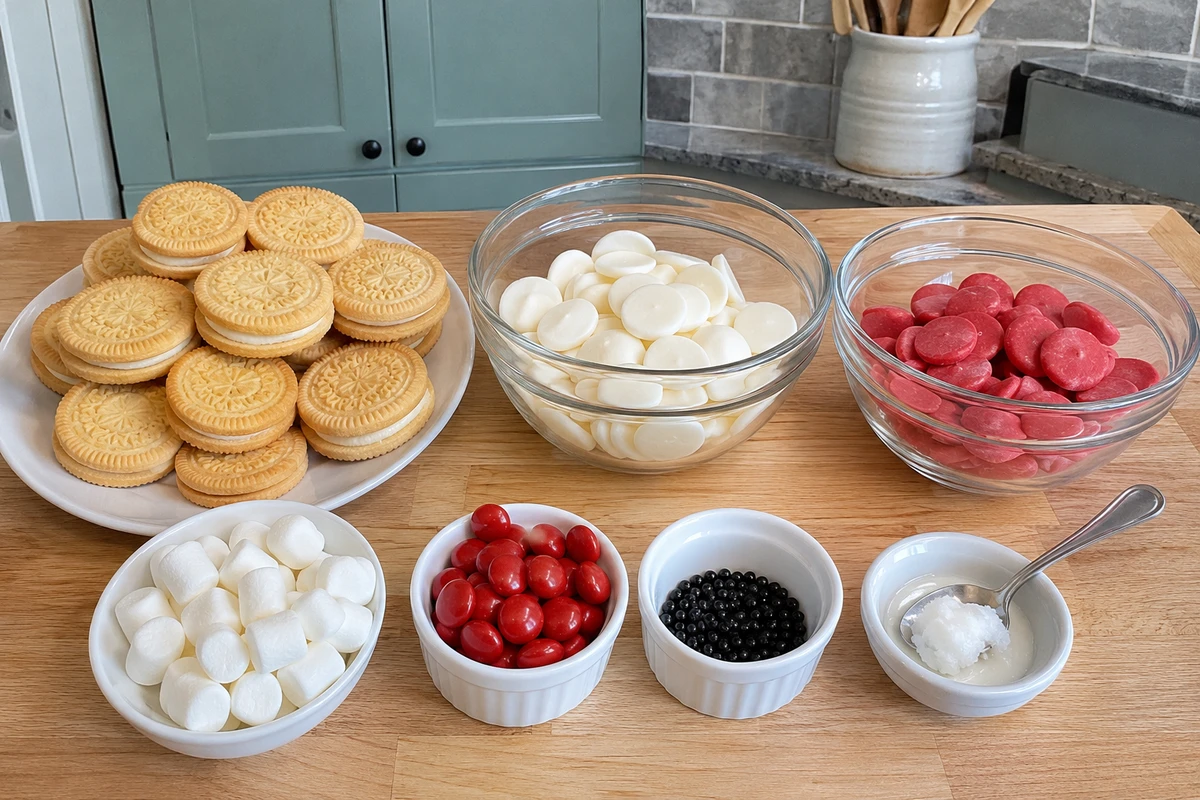
For the Cookies and Coatings
- Golden vanilla creme sandwich cookies, 24: the round sandwich style leaves a clear face area between hat and beard.
- White candy melts, 12 oz: for smooth beards. A little coconut oil can thin a thick melt.
- Red candy melts, 10 oz: enough for neat hats on all 24 cookies with a little left for touch-ups.
- Coconut oil, 1 to 2 teaspoons, optional: stir in only if the melted coating feels too thick to dip.
For the Decorations
- Mini marshmallows, 24: one pompom per hat. Large marshmallows cut in half also work.
- Red candy-coated chocolate candies, 24: pressed on as noses while the face is still tacky.
- Black candy pearls or mini semisweet chocolate chips, 48: two eyes per cookie.
How to Make Santa Cookies
Line two baking sheets with parchment. Melt candy coating in short bursts and stir often, the same gentle approach used for compound chocolate coatings.
Step 1: Melt and Dip the Beards
- Microwave the white candy melts in 20 to 30 second bursts, stirring until smooth. Thin with up to 1 teaspoon coconut oil if needed.
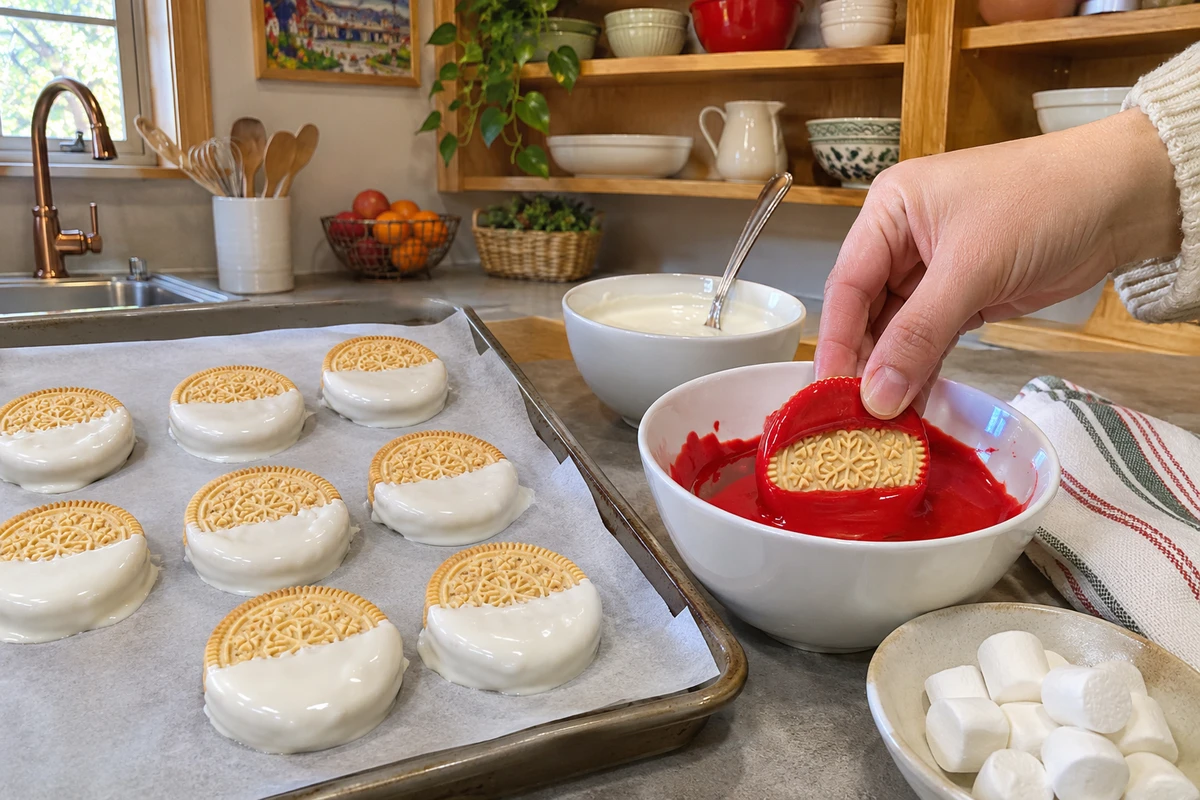
- Hold each cookie by the top edge and dip the bottom half into the white coating for the beard. Let excess drip off, then set on parchment.
- Repeat for all 24 cookies and let the white coating firm about 10 minutes until no longer wet.
Step 2: Add Hats and Faces
- Melt the red candy melts the same way. Dip or spoon red coating across the top third of each cookie for a hat, leaving a clean band of cookie for the face.
- While the red is still soft, press one marshmallow onto the tip of each hat. Add two black eyes and one red candy nose, pressing gently so they stick.
- If a decoration will not stick, dab a tiny bit of melted coating underneath. Let the santa cookies set 15 to 25 minutes at cool room temperature, or chill briefly until firm.
Expert Tips for Easy Santa Cookies
- Use dry bowls: even a drop of water can make candy melts seize into a rough paste.
- Decorate in small groups: finish six to eight cookies at a time so hats stay soft enough for pompoms.
- Leave a face band: keep a visible strip of golden cookie between the red hat and white beard.
- Remelt gently: if coating thickens, give it a short burst and stir; overheating makes it dull and thick.
These tips matter most when you are learning how to make santa cookies for the first time. Once the white beards are firm and the red hats stay glossy, the faces come together quickly and the whole tray looks ready for a Christmas dessert table.
How to Decorate Santa Cookies for a Party Tray
Set up parchment trays, melted coatings and three small dishes for marshmallows, noses and eyes. Beard first, hat second, decorations last. For a fuller holiday spread, pair them with Christmas gooey butter cookies and whipped shortbread cookies. A dish of divinity candy adds a soft, snowy sweet beside the crisp sandwich cookies.
Variations
- Chocolate base: use chocolate creme sandwich cookies so the white beard stands out more.
- Mini batch: decorate a dozen cookies with half the coatings for a small tray.
- Peppermint hint: stir a drop or two of peppermint extract into the white coating after melting.
- Snowy brim: add a light pinch of fine white nonpareils along the wet red hat edge.
What to Serve With Them
Arrange the santa cookies with a little space between each face. Serve with hot cocoa, coffee or candy cane Christmas punch. For a savory break, add Christmas tree pizza so the table is not only sweets.
Make Ahead and Storage
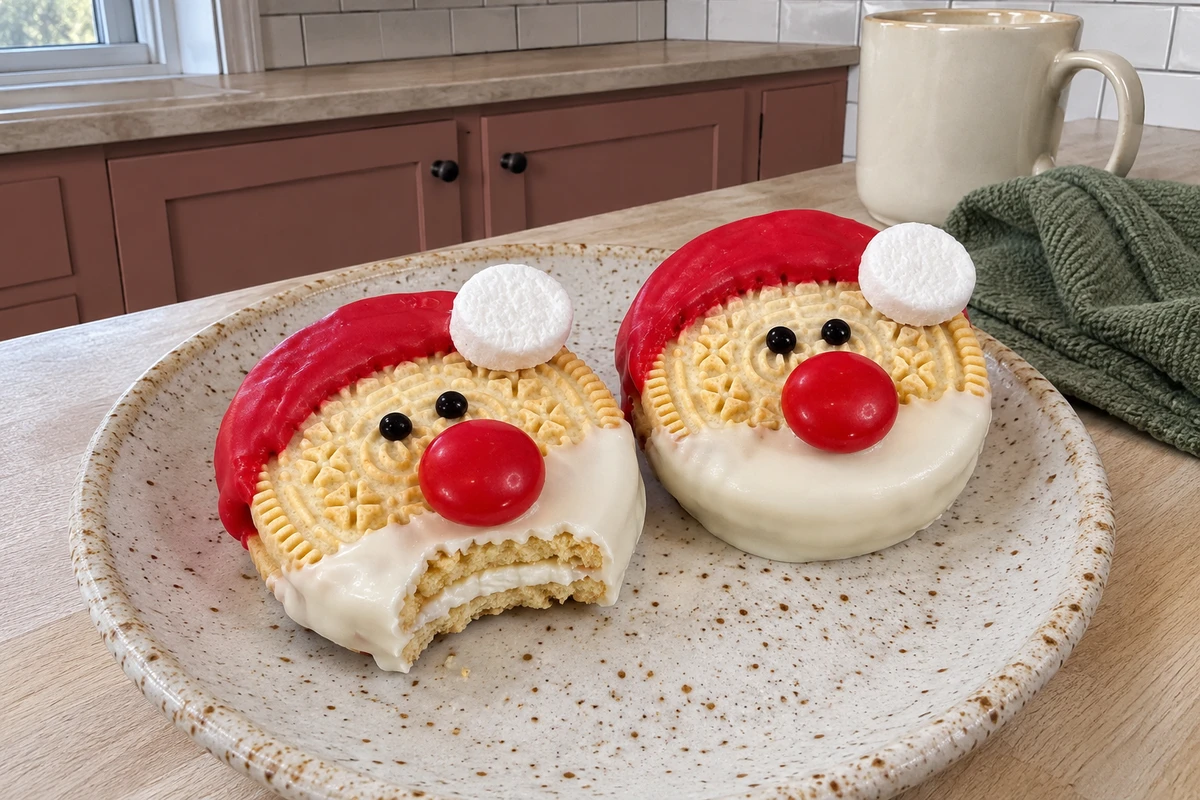
Decorate up to one day ahead and store in a single layer in an airtight container once set. Separate stacked layers with parchment. Keep finished cookies cool and dry, following solid habits from the National Center for Home Food Preservation storing guidance.
Room temperature is best for candy coatings. Freezing is not ideal because coatings can bloom and marshmallows toughen. Keep leftovers airtight up to 5 days and avoid uncovered refrigeration, which dulls the finish.

Santa Cookies
Course: DessertCuisine: AmericanDifficulty: Easy24
servings35
minutes300
kcal1
hourNo-bake santa cookies made from golden sandwich cookies dipped in white and red candy melts, finished with marshmallow pompoms and candy faces.
Keep the screen of your device on
Cookies and Coatings
24 golden vanilla creme sandwich cookies
12 oz white candy melts (or white candy coating wafers)
10 oz red candy melts (or red candy coating wafers)
1 to 2 tsp coconut oil, optional, divided (for thinning)
- Decorations
24 mini marshmallows (or 12 large marshmallows cut in half crosswise)
24 red candy-coated chocolate candies (noses)
48 black candy pearls or mini semisweet chocolate chips (eyes)
Directions
- Line two baking sheets with parchment paper. Set out the marshmallows, red candies and black eyes so they are ready while the coatings are soft.
- Place the white candy melts in a microwave-safe bowl. Microwave in 20 to 30 second bursts, stirring between each, until smooth. Stir in up to 1 teaspoon coconut oil if the coating is too thick for dipping.
- Hold each sandwich cookie by the top edge and dip the bottom half into the white coating to form the beard. Let excess drip back into the bowl, then set the cookie on parchment. Repeat with all 24 cookies. Let the white coating firm for about 10 minutes until it is no longer wet to the touch.
- Melt the red candy melts the same way, thinning with a little coconut oil only if needed. Dip or spoon the red coating across the top third of each cookie to form a hat, leaving a clean strip of cookie showing for the face between the hat and the beard.
- While the red coating is still soft, press one marshmallow onto the tip of each hat for a pompom. Add two black eyes and one red candy nose on the face area, pressing gently so they stick.
- Let the santa cookies set completely at cool room temperature, about 15 to 25 minutes, or chill briefly until the coatings are firm. Serve on a platter.
Notes
- Work in small batches so the coatings stay soft enough for decorations to stick. If a coating thickens, remelt briefly and stir; do not overheat or it can seize. Store in a single layer in an airtight container at cool room temperature up to 5 days. Freezing is not ideal; candy coatings can bloom and marshmallows toughen. Contains wheat, dairy and soy depending on brands; check labels for guests with allergies.
Frequently Asked Questions
How do I make santa cookies if the candy melts seize?
Start over with a completely dry bowl and utensils, melt in shorter bursts and stir often. A little coconut oil can loosen a thick but smooth coating; it will not fix a true seized paste.
Can I make these santa cookies the night before?
Yes. Let the coatings set fully, then store in an airtight container overnight and move them to the serving platter the next day.
What can I use instead of candy melts for decorated santa cookies?
Any smooth candy coating wafer meant for melting and dipping works. Plain chocolate chips alone are less reliable for dipping unless you are comfortable adjusting them into a coating.
How many santa cookies does this recipe make?
About 24 decorated cookies. If a few break while dipping, you will still have a full-looking tray.
How should I store leftover santa cookies?
Keep them in a single layer in an airtight container at cool room temperature for up to 5 days. Separate layers with parchment if you must stack them.